Getting Started
Source file: getting started.htm
MaterialMRT is designed to be set up using the mining operation’s databases and FMS as sources of truth. Integration of these systems are instigated upon deployment. Users with specific roles are added to the system allowing the personnel responsible to monitor and maintain data as needed.
Signing into MaterialMRT
MaterialMRT supports Microsoft Azure Active Directory for access to the system. Simply sign in using your Windows domain credentials.
To log in to MaterialMRT, follow these steps:
-
Open the URL hosting MaterialMRT.
-
When the Azure Active Directory authenticator window opens, select the account matching your user name.
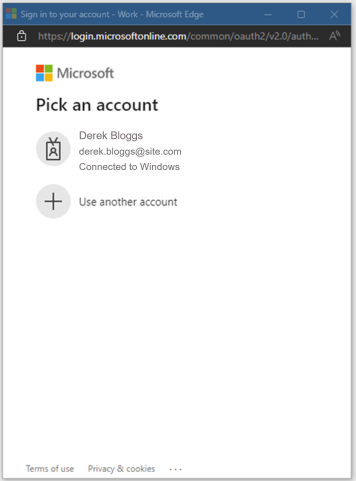
Note: After logging in, the default dashboard page is loaded. This is always your landing page when entering MaterialMRT.
Logging out of MaterialMRT
To log out of MaterialMRT, click  to expand System preferences and select
  . After logging out, you are returned to the log in page.
Permissions and access to pages and tools
When your user profile is created, certain roles will be assigned to you. These roles not only determine what transactions you may perform but it also affects which buttons and other controls are visible to you. In MaterialMRT help, all the available functions are explained, regardless of which permissions you may have. To learn more about roles and how they affect your permissions, see Roles in User and System Management > System Preferences.
Navigating MaterialMRT
MaterialMRT has two globally available elements along the top of the browser window; as follows:
-
The system management bar at the upper right-hand corner of the browser performs several functions. Administrators can manage the system using Site configuration options and system preferences in System and User Management. All users can update their telemetry preferences, log out of the system, and contact Maptek for assistance.
-
The page selection bar hosts the majority of MaterialMRT applications, they are displayed in their own pages. To learn more, see Main Pages and Tools.

Note: The default starting page in MaterialMRT is the Dashboard. A default dashboard is initially presented to all new users. Once logged in, users can create and assign their own custom or personal default dashboard to use when logging in. For more information, see Dashboard in Main Pages andTools.
Setting up for the first time
MaterialMRT requires your site parameters and zones to be set up when deploying this software. This is set up by the site administrator. Users will not have access to these settings. For administrators, refer to Site Configuration Options and System Preferences to learn about the specific configuration settings used in MaterialMRT.
Viewer controls
The viewer combines topographical imagery with features representing zones, stockpile models, block models (geological and grade control), and other features, depending on the particular viewer.
Initially, you are presented with a plan view of the topography, but you can change your viewing angle and position, and zoom in or out. All viewers perform the same basic functions. Specific viewers include additional functions and settings. To learn more about the viewer’s default controls, see View manipulation (panning, rotating, and zooming).on this page.
MaterialMRT uses Cesium ion to display your terrain. You can add additional terrain and imagery to the Cesium server through the Viewer Assets setting. To learn more, see Configuring the viewer on this page.
View manipulation (panning, rotating, and zooming)
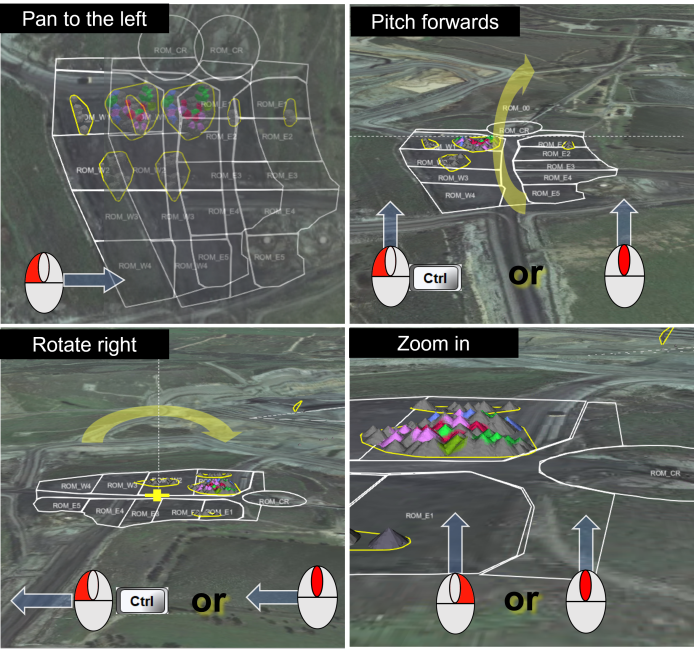
Control your pan, tilt and view in any of the viewers by using the following mouse and keyboard combinations. Using the keyboard is optional, as shown in the example below.
The direction in which you move the mouse determines the direction of the action you perform. Use the left mouse button to pan the view. Hold down the middle mouse button to rotate or pitch around the z-axis, and use the right mouse button, or scroll the middle mouse button to zoom.
Making polygons to create an area or zone
Create polygons when you need to select an area of interest. This function is supported in certain viewers, for example, the Viewer page uses this tool to discover properties within that selection. To begin, click the  button, then follow these steps:
-
Click to place your mouse at the required location and click to add a facet point.
-
Drag the mouse to and click to add more points until your area is created.
-
Press Space to finish.
Tip: Press Esc or click the
 button to remove your polygons from the viewer. Example
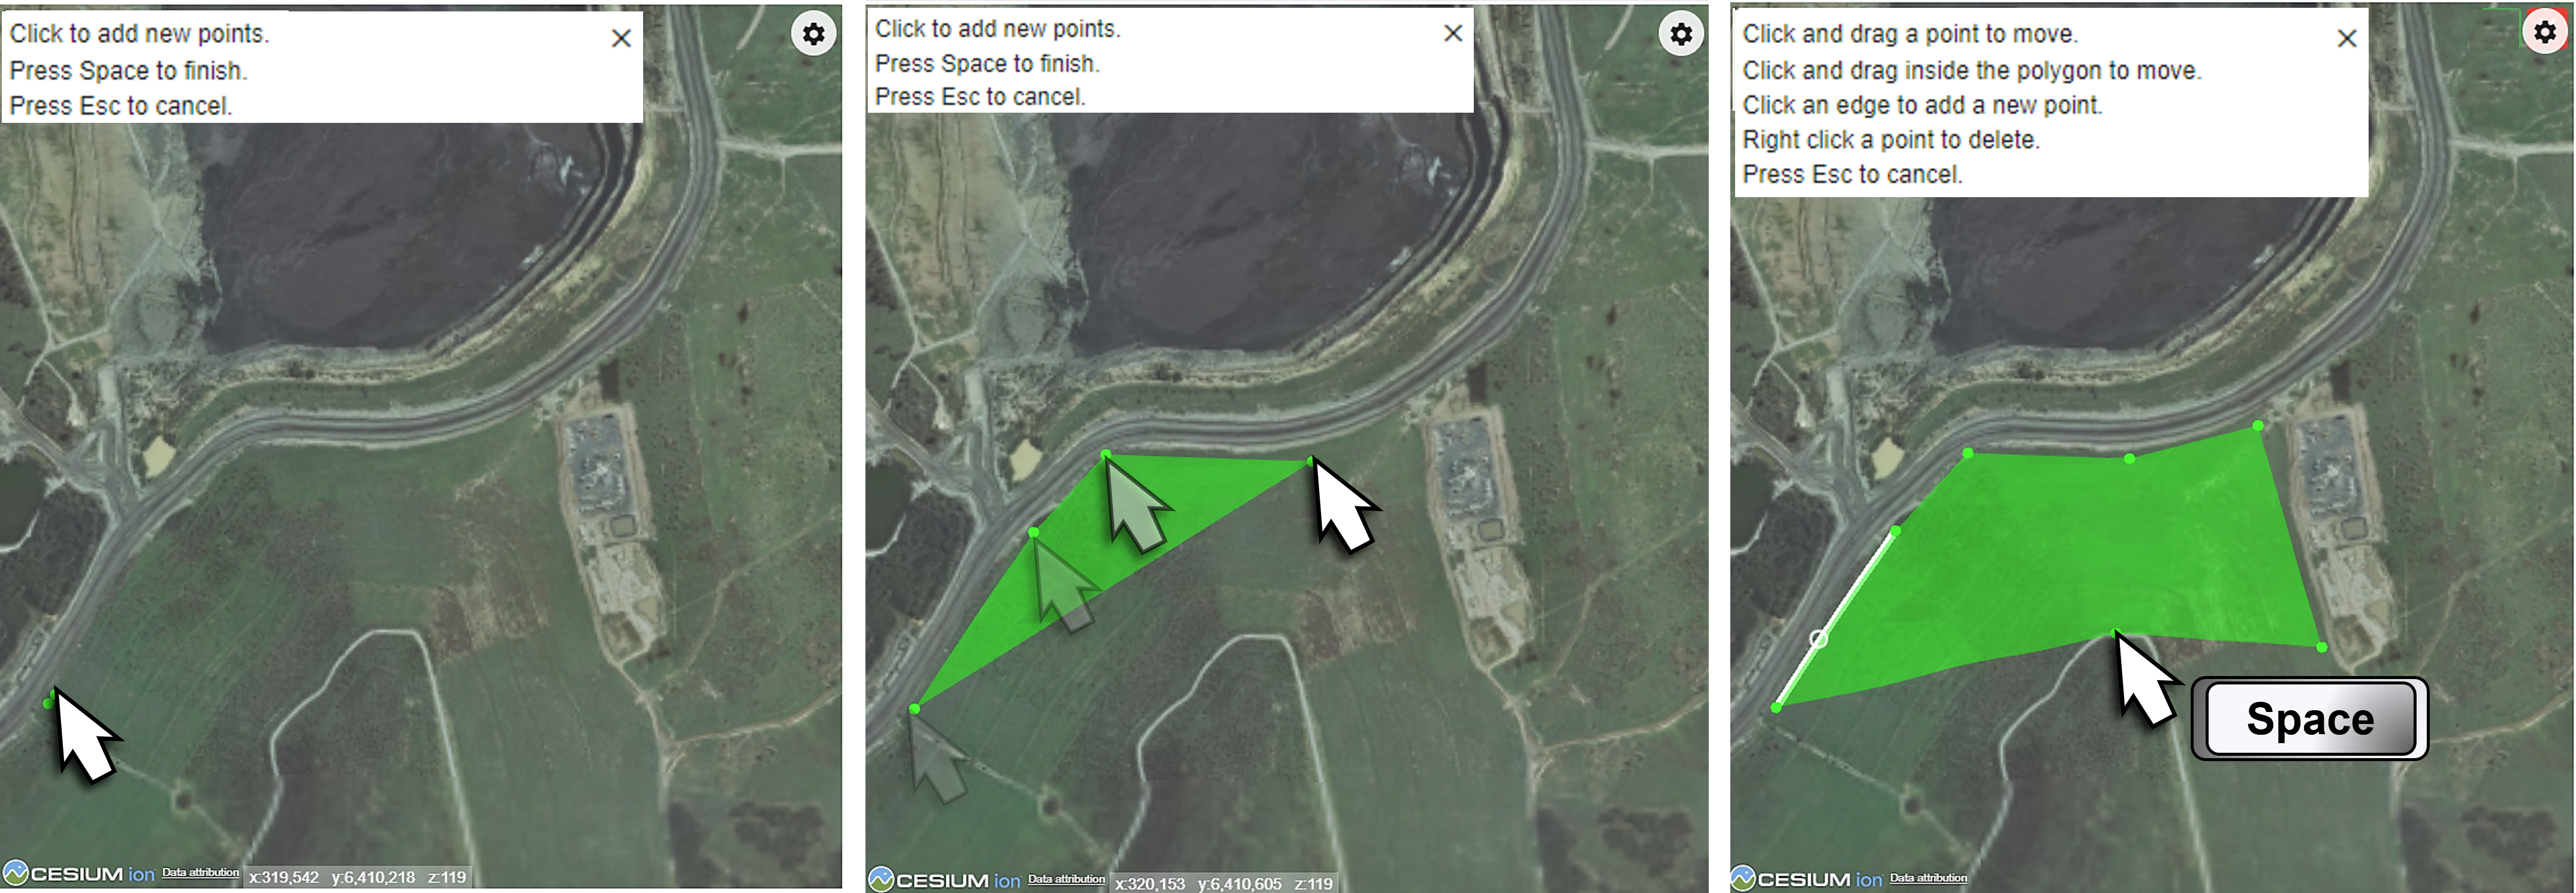
Note: When more than one polygon is created, each polygon is allocated different colour.
Modifying an area polygon
You can modify the shape of a boundary by doing any of the following:
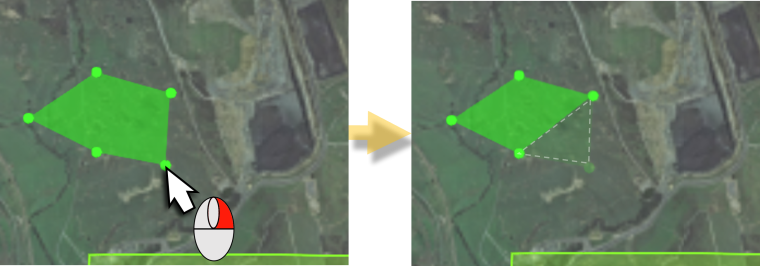
- Drag points to change the size and shape of your polygon.
- Click on a point along an edge to create a new point.
- Right-click on a point to delete it.
- Click inside the area and drag it to another location.
- Press Esc to remove the current polygon.
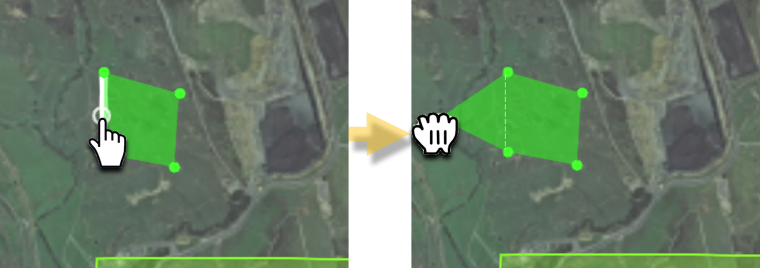
Above: adding facets to a polygon by clicking on a point along its edge and dragging it into position.
Below: deleting a point using the right mouse button.
Configuring the viewer
The terrain viewer in MaterialMRT allows users to visualise a variety of features, this can include zones, stockpiles, blocks (grade control and geological), and a variety of other details. You can configure the viewer to display the details you wish to see. The settings common to all viewers are Viewer Assets and General.
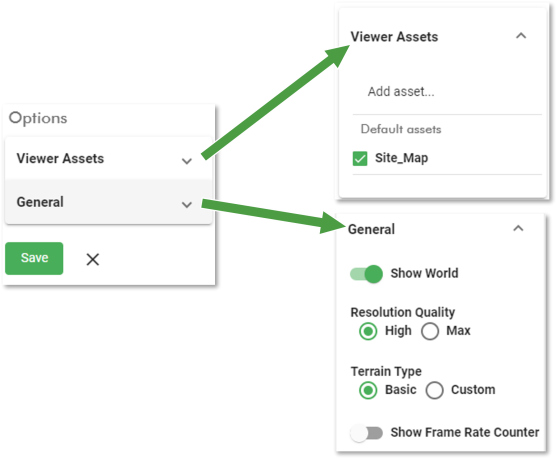
To configure the viewer, click  (viewer settings) located at the top-right of the viewer window. They are as follows:
-
Viewer Assets section: Expand the drop-down to see the settings in this section:
-
Add asset... : Click in this area to open the Add Cesium Asset dialog. Enter the Asset Name and Asset ID into their respective fields. Use the Type drop-down to select between Terrain or Imagery, depending on the dataset, then click the
 button to save your settings, or the
  button to not proceed and close the dialog.
 -
Default assets: Your viewer assets are listed here. Use the checkboxes to select which assets to include in the viewer. User-added assets display a
 (trash bin) button next to it. Use this button to remove that asset from your list.
-
-
General Section: Expand the drop down to see the settings in this section:
-
Show World: Enable this toggle to include Bing Maps (global) imagery.
-
Resolution Quality: Select High (default) to allow the system to dynamically limit the graphics quality. Select Max to enable the highest available resolution.
-
Terrain type: Select Basic to display the default Cesium ion terrain. Select Custom to display imported terrain scans.
-
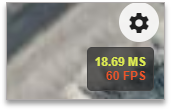
Show Frame Rate Counter: Enabled this toggle to display the viewer’s frame-rate.
-
-
To save your settings, click the
 button.
